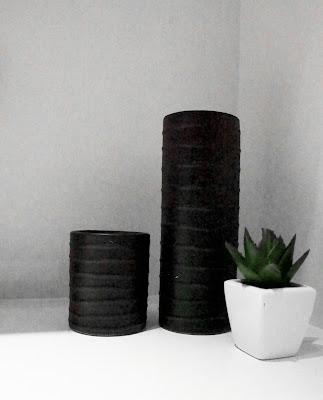
DIY - Matte Black Vase
Refurbishing an old vase is easy. There's been so many tutorials out there and it's pretty much a no brainer when it comes to simply changing the colour of an old worn vase, we've all been there and done that. BUT, have you ever noticed how difficult or how poor the results can be when it comes to refurbishing shiny ceramic? You're always left with runs and it's as if the ceramic repels any form of paint.
Today's DIY post is dedicated to that certain problem. "How can I spray paint shiny ceramic?".
It's been such a long while since I've last posted a DIY! Since I've been in such a creative mood (especially when it comes to decorating my home), I thought why not just blog about it and give you guys a few tips here and there along the way?
FYI, this DIY is so simple and cost me under $10AU to make two! Bargain? Heck yeah. Can't pass it up, and as much as I love the place, this is a bargain that even Kmart doesn't offer.
What you will need:
- Shiny ceramic vase that needs the refurbish. (Mine purchased from the Salvation Army for $3!)
- Spray paint (I chose matte black - from Bunnings)
- Sand Paper
- Sanding block (optional)
STEP ONE
Run the sand paper around the vase. Now this is one of the important steps and what really helps get the paint to grip the vase.
You don't need to get carried away with sanding back the vase, just enough to texturise it - this step shouldn't take you any longer than 2 minutes.
STEP TWO
Make sure to wipe clean the vase afterwards to take away any dirt and particles from sanding. You want the vase to be clean for the next step.
STEP THREE
Spray paint your vase. It's ideal to do it thin layers. The first layer doesn't need to be thick or completely cover the entire vase, think of this step as the primer for the next coats.
When spraying make sure to do it in short spritz, keeping the spray paint a good distance from the vase to avoid the paint from running.
Continue to spray another two thin layers in the same method, make sure you allow the vase to dry for at least 10 minutes between each coat.
There you have it! A refurbished vase that turned out perfect!
I hope this DIY blog post was helpful for you all and I hope you all enjoyed it.
Thank you for visiting my blog, don't forget to save the link for future posts!
xx/VANESSA


Comments
Post a Comment