Posts

Toddler Recipe: Meat Balls

Image
It can be so difficult pleasing picky eaters, especially when it comes to my daughter. Unlike my son she won't touch meat (unless it's ham from a pizza or Mc Donald's chicken nuggets).  As a mother we all worry about our kid's nutrition, are they getting enough iron in their diet? The last thing I want to hear from my Dr is that I'm not feeding my kids the best food.  So that's why I am sharing this recipe. Because unlike many other dishes I cook for my daughter she actually eats and enjoy these.  These are iron rich meat balls that are freezable and so dang good!    Ingredients: 500g Beef Mince 1/4 Cup finely chopped Onion 1 tsp minced Garlic 1/2 pack of frozen Spinach, thawed, drained and chopped 1/2 cup Oats 1/4 cup Parmesan Cheese 2 tbsp Worcestershire Sauce OR you could use Teriyaki Sauce (lovely flavor) 1 egg Olive Oil Method Step One Preheat oven to 175C.  Heat your olive oil in a pan and saute onions and garlic until...

DIY Make Up Brush Cleaner

Image
Keeping your make up tools clean is a very important step when it comes to make up and skin care.  I do a regular spot clean, but spot cleaning isn't enough. Without deep cleaning your make up brushes they will hoard and make the perfect home for bacteria - a big no no for your skins well being.  Not only do you want a deep cleaning solution that will get the most deepest and stubborn of make up out, but one that is soft and gentle on the bristles.  I am a huge fan of AprilJustinTV on youtube (yes this story is going somewhere) and she always talks about this home made solution she found on the internet and it works absolute wonders for her make up brushes. I had to google it.  It turned out so great, cleaning my brushes has never been any easier. Takes less than half the time it use to. I just have to share the DIY solution with you guys!   What You Will Need: - Your brushes that need a good clean - Extra Virgin Olive Oil - Soap (I prefer our ge...

DIY Nail Polish Organization & Storage

Image
On a recent episode of Vanessa's Corner I shared a Nail Polish Organisation & Storage DIY that's affordable and easy!  I hope you enjoyed the episode. Don't forget to like and Subscribe to see more videos!

Party Planning DIY - Cupcake Toppers

Image
My little man is turning 1! Ya'll know what that means?! Party planning time!  If you know me, you know I am very particular when it comes to my children's birthday parties, everything has to be customised and personalised - drives the Mr nuts! And you all know that saying, if you want it done right - you gotsta Do-It-Yourself. So on today's blog post I have documented my recent Party Planning DIY and decided to share it with you all - DIY Cupcake Toppers.  Such a fun little element to add some jazz to your cake table. And who are we kidding? We could have the most horrible looking cupcakes, but as soon as you add that cake topper ... GAME CHANGE! For This DIY You Will: - Print outs of your designed picture - since my son is having a "Thomas And Friends" themed party I ran along with that. I sized the design in the dimensions of about 3cmx3cm - Coloured Papers/Cardboard - Double Sided Tape - Tooth picks - Scissors - Stick Tape 1. Cut out your d...

Product Review: Maybelline Dream Wonder Fluid Touch Foundation

Image
On today's blog post we will be reviewing Maybelline's Dream Wonder Fluid-Touch Foundation .  On the Maybelline website Click Here the product claims are: Lightweight Perfect yet natural coverage Blends well into the skin Doesn't cake Let's review it shall we? PACKAGING Comes with 20mls or 0.67FL. OZ of product. Glass bottle Tear Drop applicator THOUGHTS: The packaging is a nice slim glass bottle which is great for storage and doesn't take much space.  Not the biggest fan of the applicator. I understand the need for innovation - but the wand just felt too flimsy in my hand. I'd seriously prefer if all foundations just came with a pump.  TRIAL Before Application Redness, scarring, hyper pigmentation and dark under eye circles - yup, lucky me.  After One Layer Of Application (no primers, powders or concealers applied) What I noticed: Hides redness, scarring and hyper pigmentation Evens skin tone Can still see...

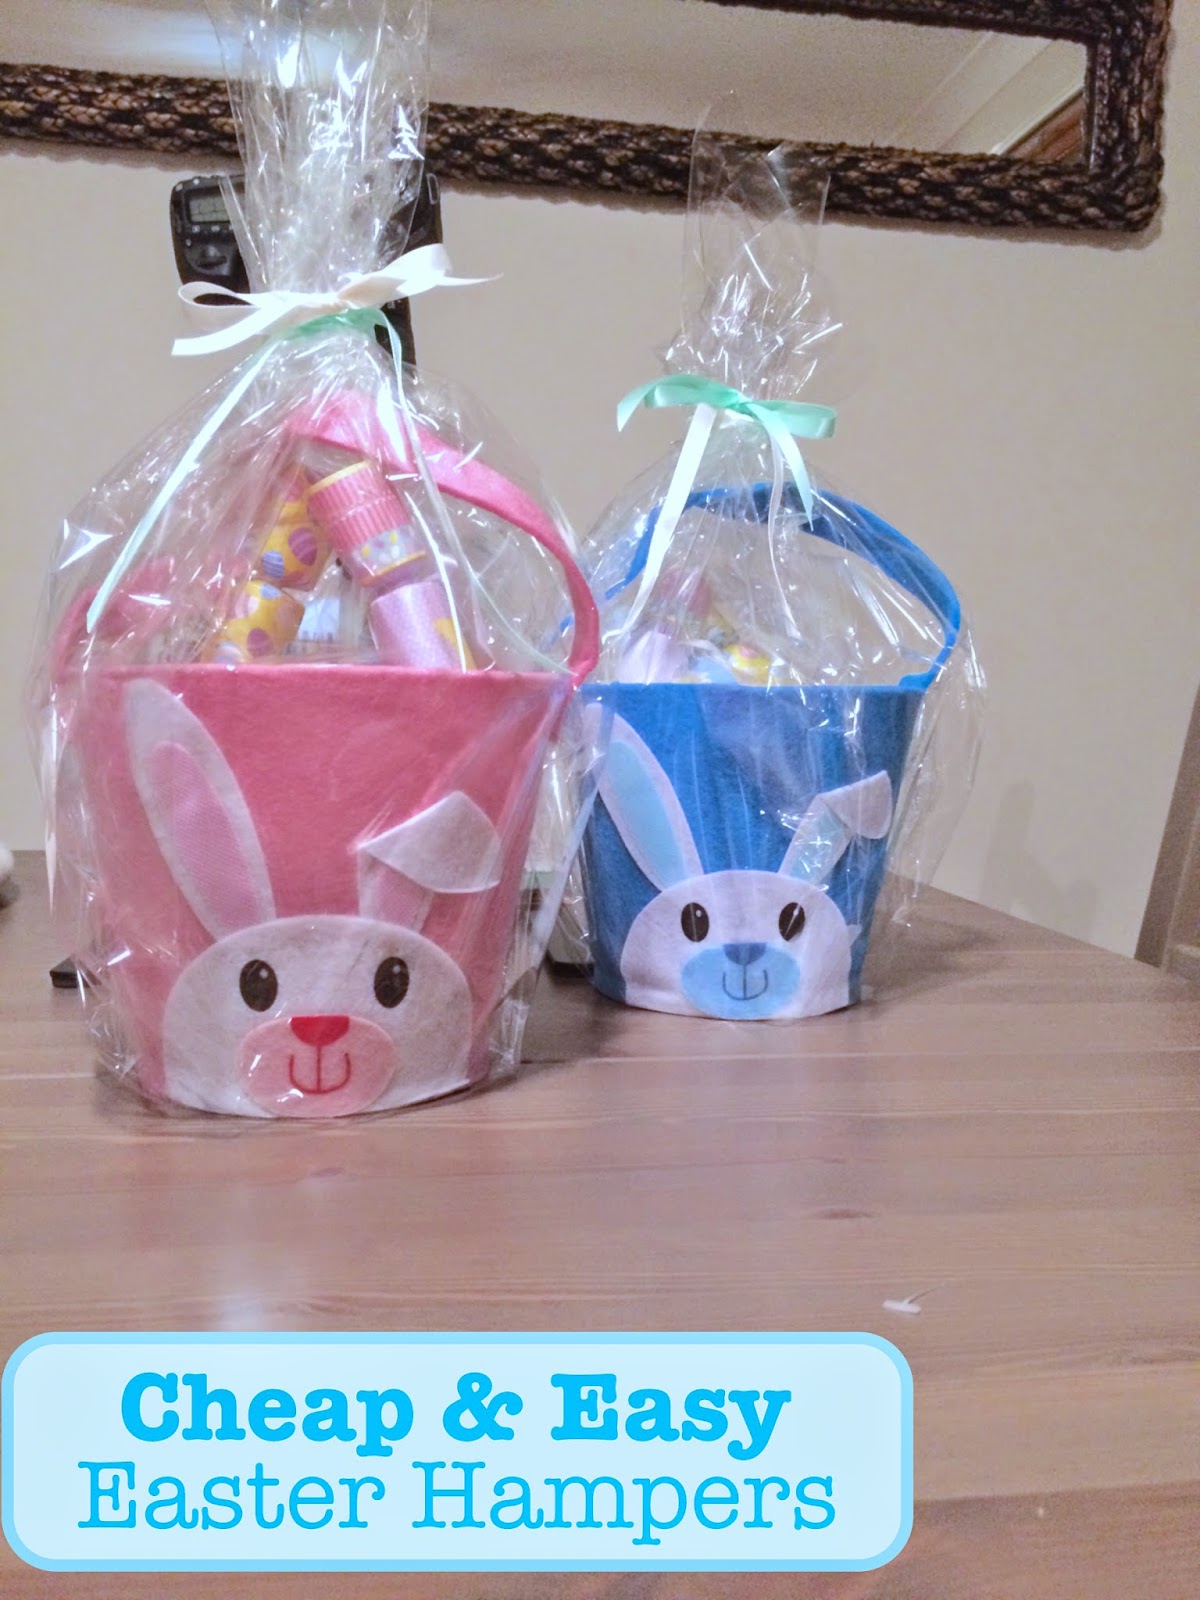
DIY: Cheap & Easy Easter Hampers

Image
Easter is coming! Ya'll know what that means... chocolate, chocolate and more chocolate! Oh! And did I mention chocolate? On today's blog post I decided to document and share with you tips on how you can easily make a cheap Easter Hamper for your kids, your nieces and nephews, or whomever you want to spoil this Easter! Supplies: Baskets/Containers - Mine are felt baskets from Kmart. Shredded Paper - Kmart Chocolate Eggs (of course) - I bought a packet of 4 kinder surprises from Big W (What kid doesn't love kinder surprises?) Knick Knacks - For random fillers that kids would enjoy the day of opening I purchased  a packet of 8 Easter themed bon bon's (Big W), Easter themed play dough (once again, what kid doesn't like play dough?) - from Woolworthes and a cute little wind up chick (Big W) TIP: This may sound sneaky, but a good way to fill your hamper and make it look "fuller" is by getting some shredded paper for the base of ...

DIY: Chevron Designed Canvas

Image
Yes, I am back with another home decor DIY. This one is for a chevron designed canvas that I painted for my little collage mirror wall in our master bedroom. Don't get me wrong, I love my little clusters of mirrors on my wall but I felt it needed a little break and interest so I made this canvas.  For This DIY You Will Need: - Canvas  - size is your choice - Masking tape - Scissors - Basal Wood Design  - this is optional, I chose a wooden anchor, purchased from Bunnings. - Acrylic Paint  - one for the chevron design and another for the basal wood stencil - Paint Brush - Strong Adhesive/Glue  - I went with double sided tape. 1.  Using your masking tape and scissors, mask your chevron design onto your canvas. 2.  Paint over your canvas and chevron design with your chosen acrylic paint. You can do one coat, but I went with three for a more solid colour.  3.  Allow...